
The following steps apply to printers where the Celiveo embedded agent has been installed by the Web Admin
For printers that do not accept the Celiveo Print agent, read that chapter.
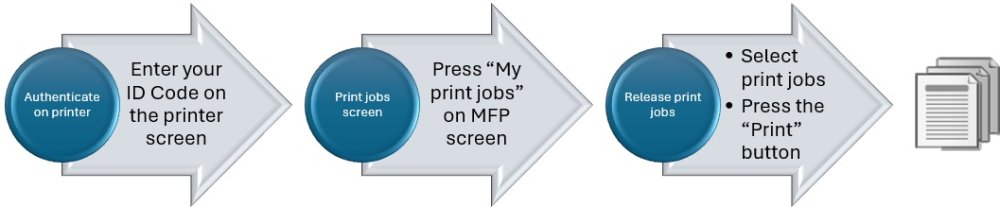
Authentication on the printer
Authentication on the printer can be performed using:
- an ID Code, a numeric or alphanumeric ID unique to a user and entered on the printer screen
- a proximity card, shown to the card reader
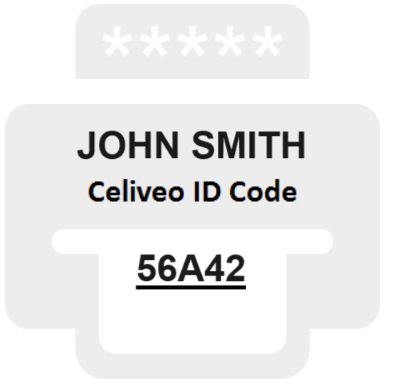
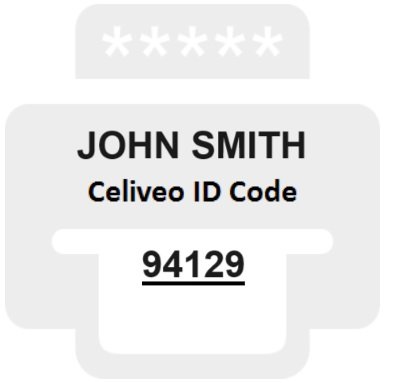
Obtaining a user ID Code
The first time a user submits a print job, a PIN code is automatically generated and emailed to that user by Celiveo 365.
It contains the user name and the ID Code assigned to the user.
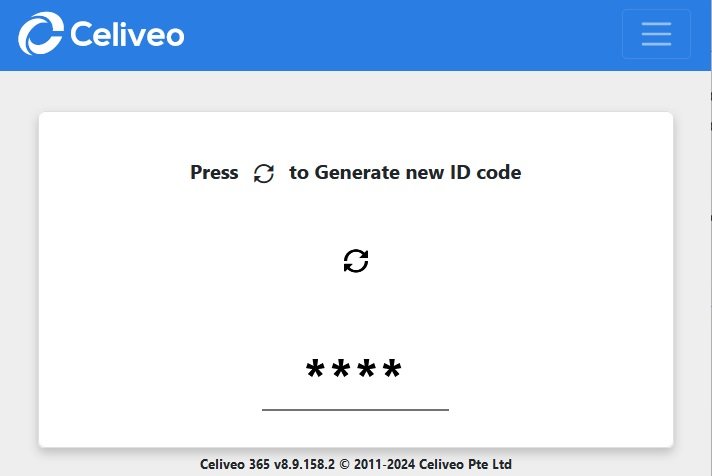
Users who forget their ID code or want to change it can go to the ID Code self-service portal:
https://pin.cvo365.com
It is simple, secure as access is protected by Entra ID and the UI is very intuitive:
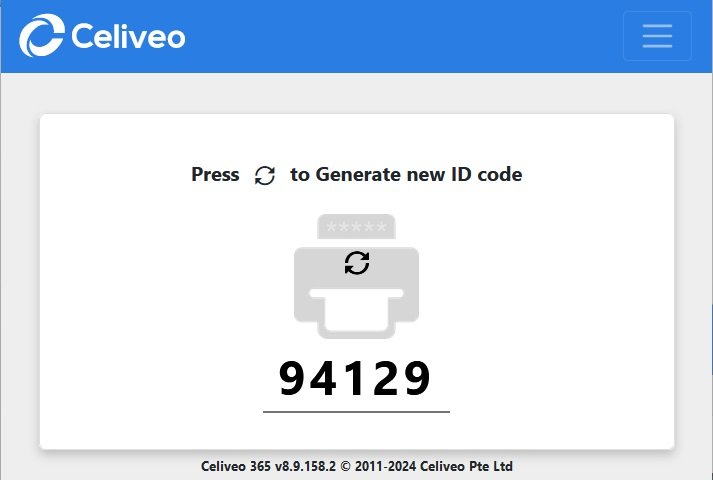
Upon request for a new ID Code an email is sent to the user to confirm the new ID Code and inform the user a change has happened.
It contains the user name and the new ID Code.
Using a badge on the card reader attached to the printer
The first time a card is shown to a reader attached to a printer controlled by Celiveo 365, the printer prompts the user for his ID code.
The user enters the ID code received by email, Celiveo 365 stores the SHA256 of the card number in Azure together with the SHA256 of the user Entra ID identifier. No user information is stored in Celiveo 365 databases in the Cloud, for full security, PII protection / GDPR compliance.
After a user successfully authenticates on a printer
The printer home screen contains the printer functions icons, and a “My Print jobs” button.
The logged-in user name appears on the top of the screen.
Releasing pending pull print job
Press the “My print jobs” button on the printer front screen to access the screen with the pending print jobs.
Select print jobs from the list.
Choose between Print, Delete. For Print, set the Black&White and multi copy options before pressing the Print button.
The documents are pulled form the Cloud, decrypted on the fly and printed.
Logout from the printer
- With ID Code authentication: press the logout button on the printer screen
- With card authentication: show again your badge to the reader.
Post your comment on this topic.