
Add Users as Administrators

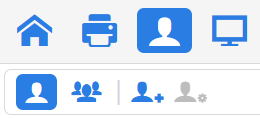
  1. From the main menu, click Users .
  2. In the secondary toolbar, click Add Users .
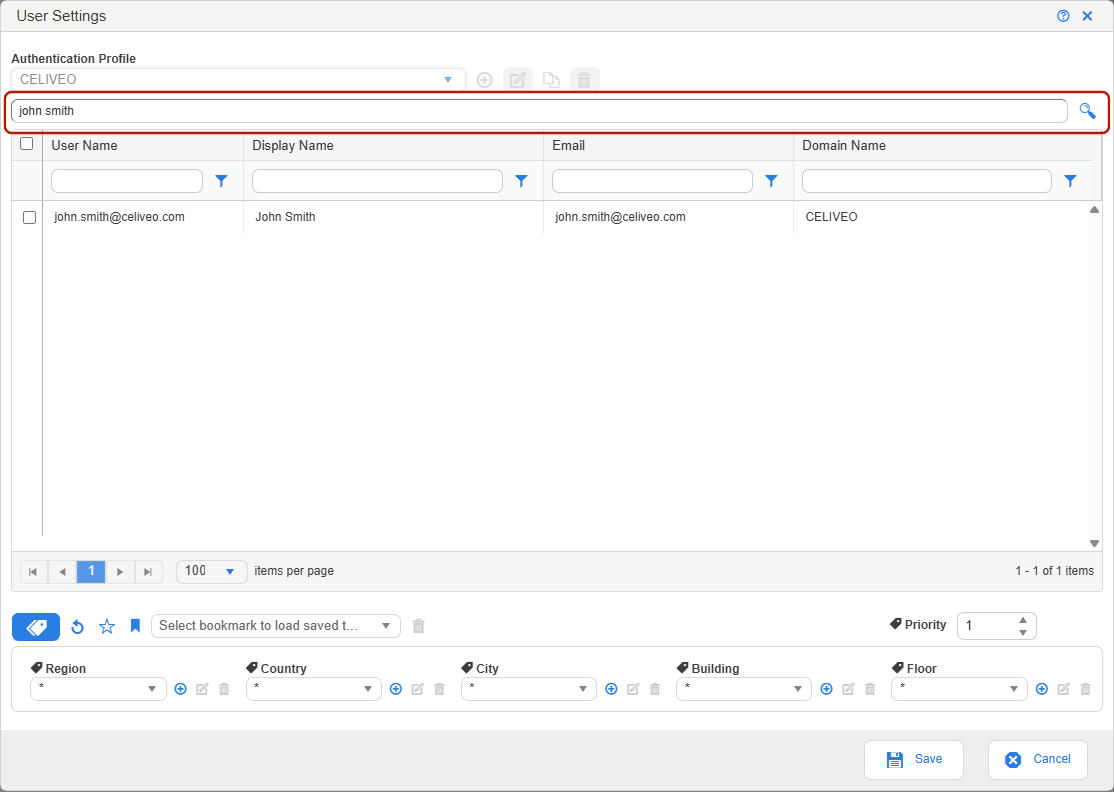
  3. In the User Settings tab, click the Search icon next to the [Search box] to list the first 1000 users from the selected Entra ID. You can also type partial names or characters to narrow the list.
    p(banner tip). Note: Wild or special characters cannot be used for Search.
  4. Select the users you want to add.
    p(banner important). Note: To create Universal Print queues, users must hold the Printer Administrators role in Entra ID.
  5. Specify the tags that define the community the new users will belong to.
    p(banner tip). Notes: ** The new users inherit your community by default. ** You can change only those tags marked * in your own tag assignment, allowing you to scope the new users into a sub-community of yours. ** When the new users print via Print Direct, only printers that share their community are listed. ** The tag assignment determines which printers, users and groups they can see in the Web Admin; their roles (next step) determine what they can do.
  6. Set Priority between 1 and 100. When a user inherits a community from several sources, the highest priority wins.
  7. Click Next > to switch to the Role Based Access Control tab.
  8. In the Select… dropdown, pick a role and add it. Repeat for additional roles. To remove a role, click the trash icon next to its row. The available roles are:
    • Administrator – full access, restricted only by tags. With */*/*/*/* tags the user becomes a Super Admin.
    • AI Administrator – access to AI features only (AI-DLP and AI-Doc).
    • Report Administrator – access to Reports only (Tracking Report, Quota, Power BI).
    • Technician – can add or remove printers; cannot create CVP, UPE or MUP queues, cannot create or delete profiles, cannot change global settings, and has no access to Reports, AI features or User Management.
  9. Click Save.

The new users can now sign in to the Web Admin with the rights granted by their roles, scoped to their community.

Add Groups as Administrators

  1. From the main menu, click Users .
  2. In the secondary toolbar, click Groups , then Add Group .
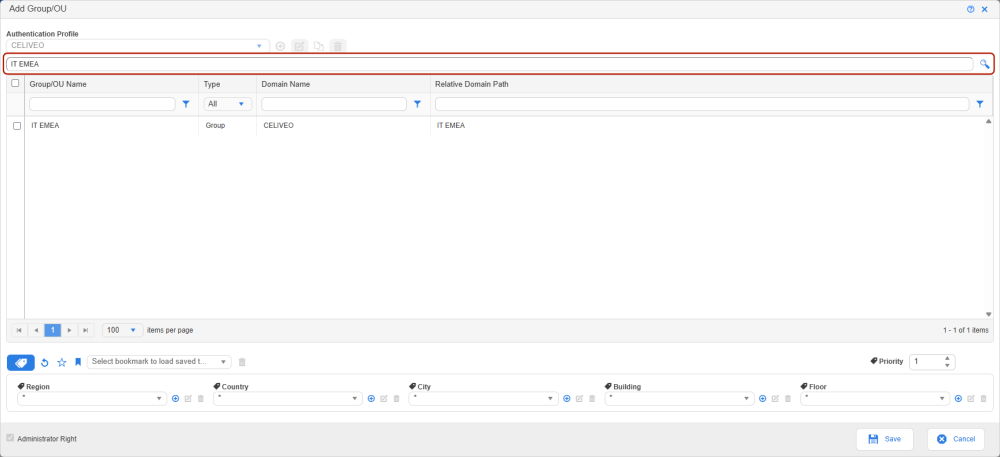
  3. In the Group Settings tab, click the Search icon next to the [Search box] to list the first 1000 groups from the selected Entra ID. You can also type partial names or characters to narrow the list.
    p(banner tip). Note: Wild or special characters cannot be used for Search.
  4. Select the groups you want to add.
    p(banner important). Note: To create Universal Print queues, group members must hold the Printer Administrators role in Entra ID.
  5. Specify the tags that define the community the group members will belong to.
    p(banner tip). Notes: ** Group members inherit your community by default. ** You can change only those tags marked * in your own tag assignment, allowing you to scope the group into a sub-community of yours. ** When members print via Print Direct, only printers that share their community are listed. ** The tag assignment determines which printers, users and groups they can see in the Web Admin; the roles assigned next determine what they can do.
  6. Set Priority between 1 and 100. When a user inherits a community from several sources, the highest priority wins.
  7. Click Next > to switch to the Role Based Access Control tab.
  8. In the Select… dropdown, pick a role and add it. Every member of the group inherits the role. Repeat for additional roles. To remove a role, click the trash icon next to its row. The available roles are:
    • Administrator – full access, restricted only by tags. With */*/*/*/* tags the user becomes a Super Admin.
    • AI Administrator – access to AI features only (AI-DLP and AI-Doc).
    • Report Administrator – access to Reports only (Tracking Report, Quota, Power BI).
    • Technician – can add or remove printers; cannot create CVP, UPE or MUP queues, cannot create or delete profiles, cannot change global settings, and has no access to Reports, AI features or User Management.
  9. Click Save.
Last modified: 4 May 2026

Feedback

Was this helpful?

Yes No
You indicated this topic was not helpful to you ...
Could you please leave a comment telling us why? Thank you!
Thanks for your feedback.

Post your comment on this topic.

Post Comment