
Create Microsoft Universal Print Queues
When you set up a Celiveo 365 MUP Virtual Printer, the Web Admin generates a Virtual Printer in Microsoft Universal Print that is visible as a native Cloud printer on the Win10/11 PC connected to your corporate domain.
When the user prints a document on such a Cloud printer, Microsoft Universal Print renders the print job on the local PC, sends the resulting file to Azure where it is transmitted to Celiveo 365. The next steps by Celiveo 365 are the instant print job encryption (with dynamic AES2566-GCM key) then secure retention in the an Azure blob.
The user can go to any Celiveo-enabled printer, authenticates at the printer, and selects the job for release.
Creating the Microsoft Universal Print queue is fast and easy:
- On the Celiveo 365 Web Admin portal, click the
![celiveo-Cloud Printers]() printers icon then the
printers icon then the ![Celiveo-365-add-Cloud-virtual-printer]() button.
button. - Select the first icon on the left, it is for the Microsoft Universal Print virtual printers creation
![]()
- In the Name for the Celiveo Virtual Printer in Microsoft Universal Print field, enter a unique name for the printer. The name must NOT contain spaces or special characters. As an example, a valid name is corporate-cloud-printer.
- To continue, click Next >.
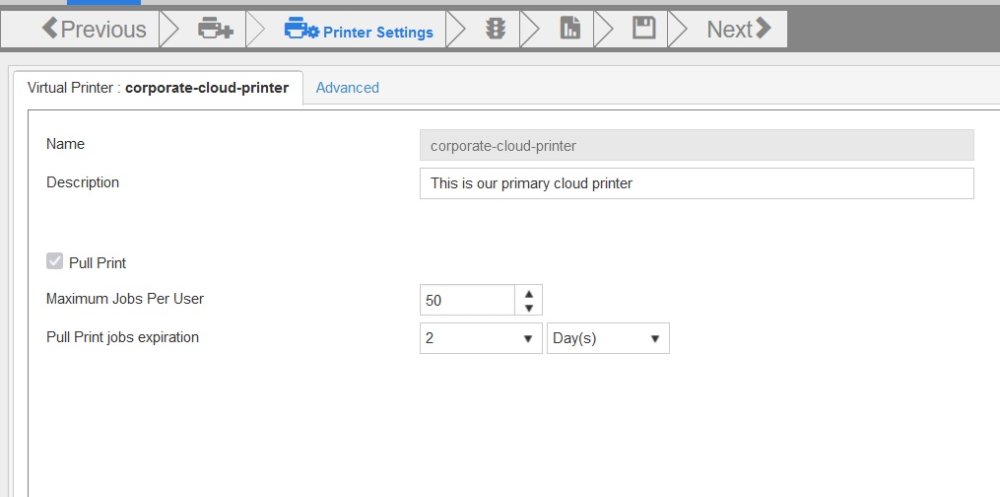
![Celiveo 365 - Microsoft Universal Print queue settings]()
- Configure the Virtual Printer settings:
- The Description field allows you to enter a description to identify your Virtual Printer, it will appear on the printers list in the Celiveo 365 Web Admin portal.
- Maximum Jobs Per User: This field allows you to define the maximum number of Pull Print jobs allowed per user.
- Pull Print jobs expiration: This field allows you to define the Pull Print jobs expiration delay in days or hours.
![]()
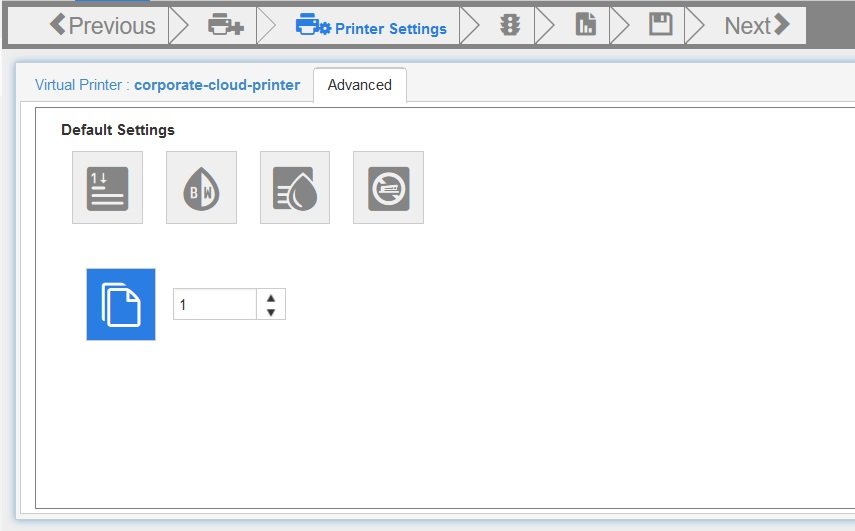
- The Advanced settings allows to force some print properties for that pull print queue, in example force printing to B&W
![]()
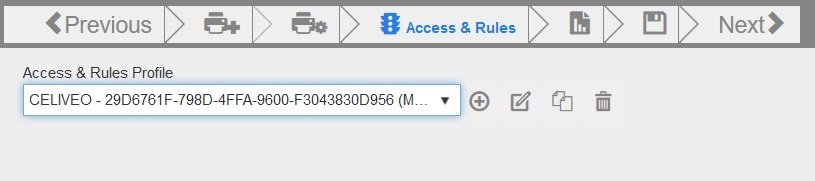
- Access Control profiles are automatically generated by Celiveo 365 at subscription time, according to your Azure Active Directory settings. However, these profiles can be edited and new ones can be added. To learn more about Access and Rules profiles and how to automatically make Microsoft Universal Print queues visible to user groups, please see this section.
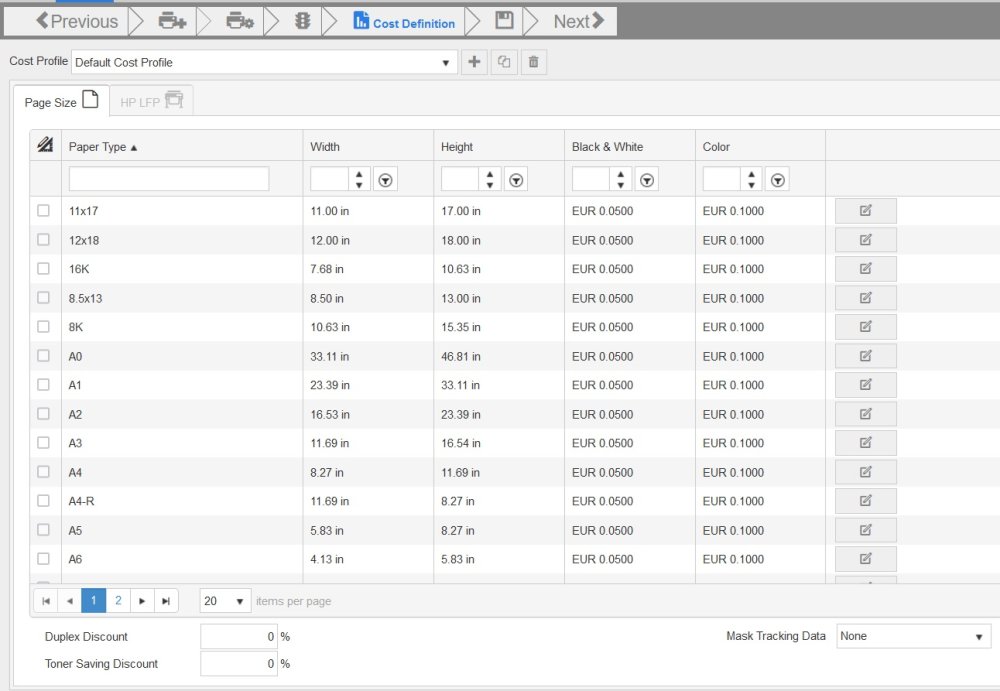
![celiveo 365Microsoft universal Print cost settings]()
- Keep the default Cost Definition Profile, edit it or create a new one.
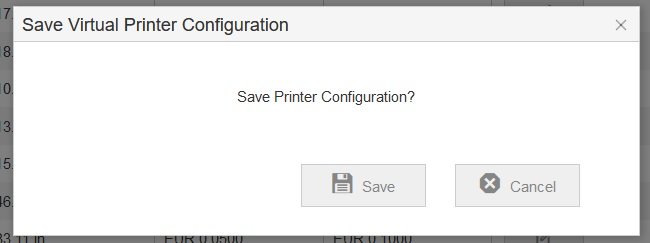
![save Microsoft Universal Print queue]()
- When prompted, save the configuration.
 printers icon then the
  button.
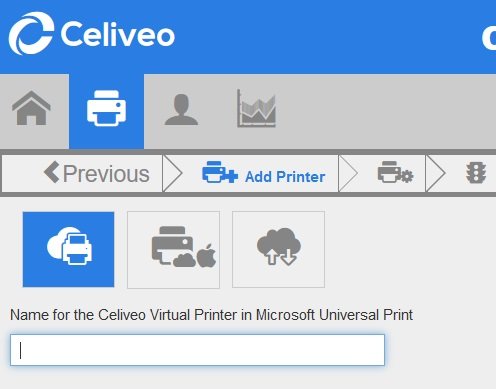
After you save the print queue, the screen brings you back to the main printers list.

Your new Microsoft Universal Print virtual printer appears, with the following status: “Sync request sent”.
The Microsoft Universal Print queue is being created by Celiveo 365 in your tenant, that process takes between 20 and 40 seconds.

The virtual printer status changes to “synchronized” when the Cloud print queue is available in your Microsoft 365 / Azure tenant.
It will appear in the list of cloud printers under Windows 10/11, when adding printers.
Adding the Microsoft Universal Print queue to a Win 10/11 PC
The Win 10/11 PC needs to be linked to your Work domain (the same that’s linked to Celiveo 365)*
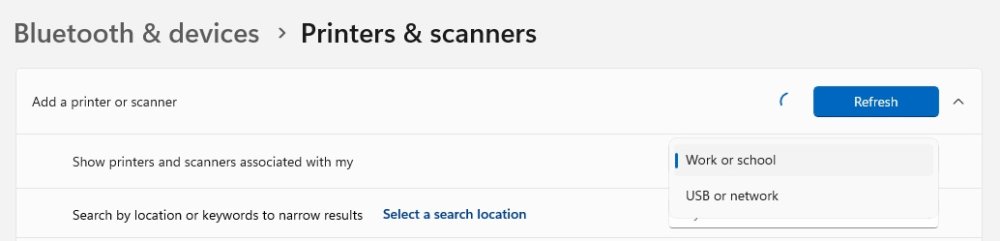
In the Windows settings, select Add printer, wait a few seconds that the list shows “Show printers and scanners associated with my” and select “Work or school”. Do not select “USB or network”.
Microsoft Cloud printers, created from Celiveo 365 web portal, appear with a special icon:  .
.
Locate the MUP Cloud printer that was just created in Celiveo 365 to add it to your PC, wait until the installation is completed, it will go through 3 phases: connection, installing, ready,
Example for the Windows Cloud print queue created above:
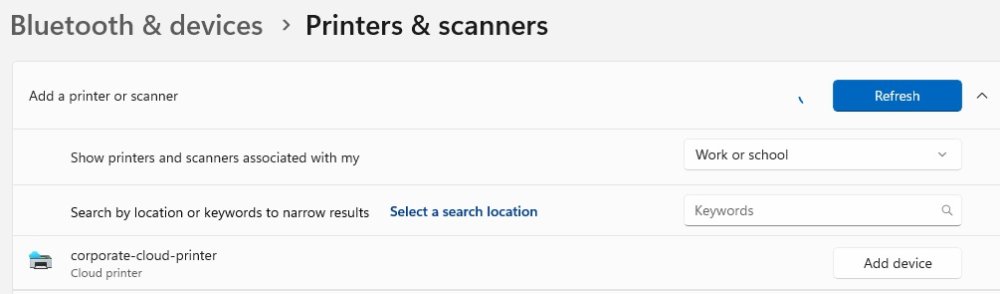
Click on “Add device” to install the printer.
The next steps happen automatically.


The Microsoft Universal Print queue is now ready to be used on the PC.
Post your comment on this topic.