
- Go to the Web Amin and login with your Entra ID print administrator administrator account.
- Under
![]() Printers select a supported printer in the printer list. Currently only Ricoh SOP 2.0, 2.5 and 3.0 devices support this feature.
Printers select a supported printer in the printer list. Currently only Ricoh SOP 2.0, 2.5 and 3.0 devices support this feature. - Press
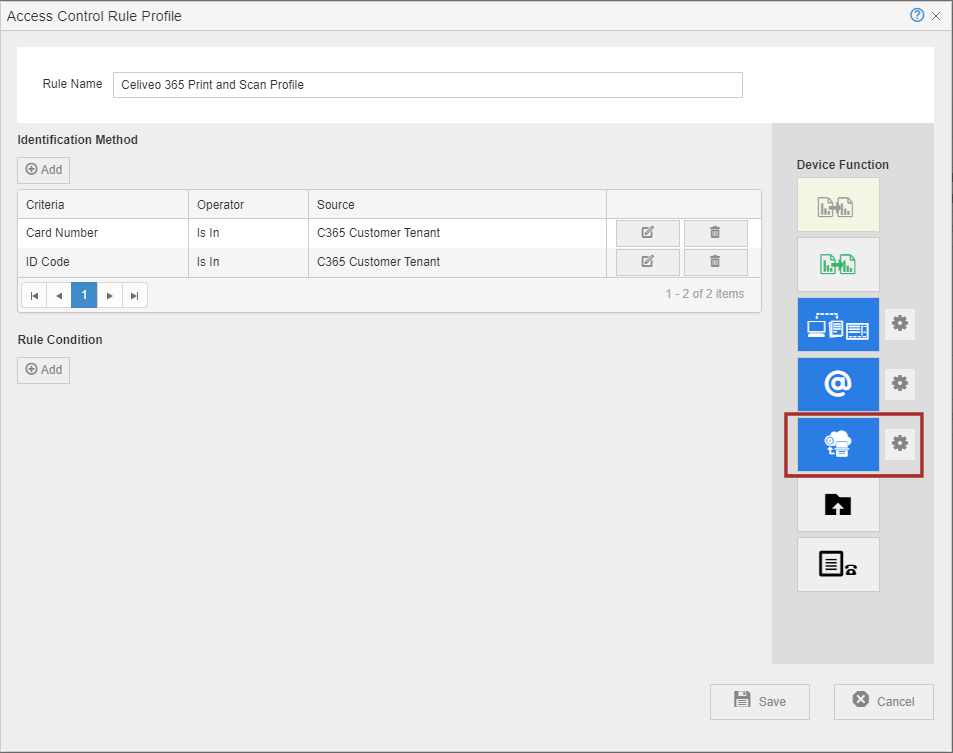
![]() Access and Rules create or select a Access Control Rule.
Access and Rules create or select a Access Control Rule. - Under Access Control Rules Enable Celiveo 365 Scan and press
![]() settings.
settings.
![]()
Configure Email
![]()
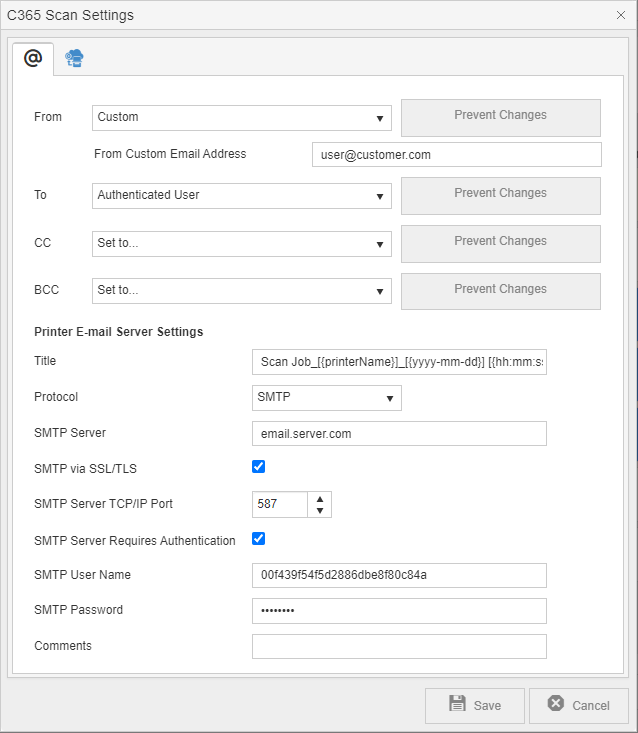
Fill the fields and press save.
| Setting | Description |
|---|---|
| From | Name of sender (e-mail address, full name) from field |
| To | Name of recipient |
| CC | Name of recipient to copy |
| BCC | Name of recipient to copy and hide |
| From the From/To/CC/BCC drop down menu, select one option | |
| Set to… | This means the field is blank. |
| Authenticated User | The authenticated user’s email is used. |
| Custom | Define a custom email that will be visible to the receiving user. Only for From, CC and BCC. |
| Printer E-mail Server Settings | |
| Title | Scan Job name that will be sent. See further information |
| Scan Job Title Options | |
| Hour | [yyyy-mm-dd] for the date in international format |
| Hour | [mm-dd-yyyy] for the date in US format |
| Hour | [dd-mm-yyyy] for the date in EU format |
| Hour | [{hh:mm:ss24}] for the printer local hour in 24h format (00:00:00->23:59:59) |
| Hour | [{hh:mm:ssAM}] for the printer local hour in US format (AM/PM) |
| Printer Name | [printerName] for the printer name in the internal printer config (if available) |
| Logged In User Name | [userDisplayName] for the auth user displayName |
| Protocol | SMTP |
| SMTP Server | Define the email server used to send scan jobs as attachments in emails |
| SMTP via SSL/TLS | Enable / Disable SSL/TLS use |
| SMTP Server TCP/IP Port | SMTP port used to communicate with the Email Server |
| SMTP Server Requires Authentication | Define if the Email Server requires authentication |
| SMTP User Name | Define username used to communicate with the Email Server |
| SMTP SMTP Password | Define password used to communicate with the Email Server |
| Comments | Add any information to other admins that will check this profile |
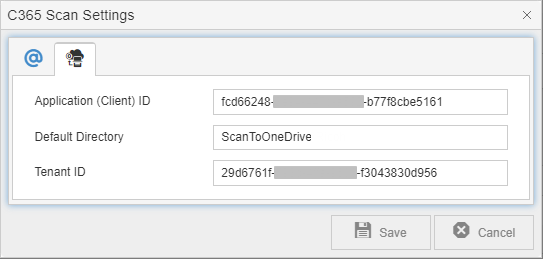
Configure OneDrive
![]()
| Setting | Description |
|---|---|
| Application (Client) ID | The Application ID is defined in Azure when the Oauth2/OneDrive application is registered. Past the information Application ID that was defined while registering the application in Azure. Information on how to obtain the ID can be found here. |
| Default Directory | Folder on which the Celiveo 365 Scan Application will save the Scan Jobs |
| Tenant ID | The Tenant ID is defined in Azure when the Oauth2/OneDrive application is registered. Information on how to obtain the ID can be found here. |
Last modified:
1 September 2025
Post your comment on this topic.