
On this page, you can add or delete a printer. Or, simply get an overview of all the printers managed by Celiveo 365 Web Admin. Click on one of the sections for details:
- About the printers list
- Add printers
- Add a Microsoft Universal Print queue
- Edit printer settings
- Delete a printer
About the printers list
![]()

The printer list provides information on each printer added to Celiveo 365 Web Admin. You can adjust the format of the printer list to suit your information needs. Save the order of the columns and access the same view the next time you log in.

Create a customized printer list
- On the right-hand side of the screen, select the
![]() icon.
icon.
![]()
- When prompted, enter the name for the customized view and click [Save].
- Make the adjustments (if required):
- To reorder the columns:
Click and drag the selected column to the target location. Release to insert the column at the new location. - To show or hide a column:
Click on the down arrow next to the column label, select [Columns]. Check or uncheck the box next to each column header to show/hide.
![]()
- To sort the fields under a column:
Click once on the column header, for example [Printer Brand]. Click on the column header again to sort in ascending or descending order. - To customize the labels of Tags 1 – 5,
Click on the![]() icon on the top right corner of the screen. See the Help on Renaming Tags.
icon on the top right corner of the screen. See the Help on Renaming Tags. - To search a printer by its printer properties or assigned tags,
Enter the required field in the search box under each column header and click Enter.
- To reorder the columns:


- To save the changes, click on the
![]() Save icon.
Save icon.
- To rename the customized view,
Click on the![]() icon.
icon.
When prompted, enter the new name and click [Save]. - To delete a customized view,
Click on the![]() Delete icon.
Delete icon.
When prompted, click [OK].
- To rename the customized view,
Add printers
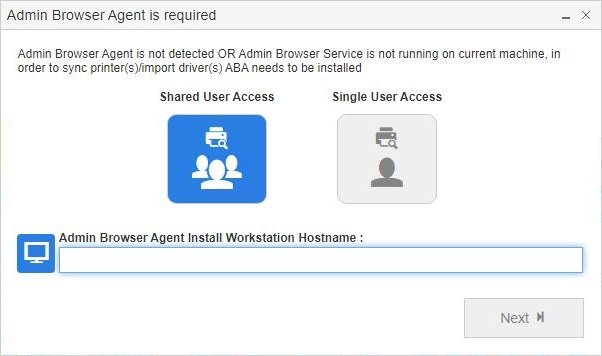
Start Celiveo Admin Browser Agent
The Admin Browser Agent is plugin that is locally installed to allow synchronization with local printers. It needs to be downloaded in order to add physical printers. The download is prompted at startup in a popup window.
Discover Printers
You can use one or both of the available options to search for printers in the network.

1 – SNMP / ICMP (Ping) / IPP Settings
The Admin Browser Agent employs a multi-protocol strategy to discover and identify supported printing devices on your network. The discovery process is designed to be both efficient and comprehensive, starting with a broad search for active network hosts and then interrogating them to gather specific device characteristics. For successful and accurate device discovery, it is crucial that your network environment and device settings are correctly configured in the agent.
This process relies on the following core technologies:
- ICMP (Ping): For initial host detection.
- SNMP (v2/v3): For detailed device identification.
- IPP/IPPS: For confirming print capabilities and enabling specific print workflows using MyCeliveo \ Universal Printer Endpoint.
ICMP Ping
The agent uses an ICMP (Internet Control Message Protocol) “ping” as a rapid first step to verify if a target IP address is an active host on the network. This allows the agent to quickly discard inactive IP addresses from its search queue.
- Configuration: If your network security policies block ICMP traffic, you must disable this option in the agent’s settings.
- Impact: Disabling ICMP Ping will significantly increase the time required for device discovery. The agent will be forced to wait for a full connection timeout for each non-responsive IP address instead of receiving an immediate response.
SNMP (Simple Network Management Protocol)
Once an active host is detected, the agent uses SNMP to query it for detailed information. This data is essential for identifying the device and its capabilities. Non-exhaustive information gathered includes:
- Model Name
- Manufacturer
- Color Capability
- Maximum Supported Page Size eg: A4 / Letter – A3 / Tabloid
- Printer Hostname
- Serial Number
- MAC Address
- Firmware Version
- Configuration: The agent defaults to using SNMPv2. If your printing devices are configured to use a different SNMP version (e.g., v3) or a custom community string, you must replicate those settings in the agent’s * SNMP v2/v3 configuration area.
- Impact: Failure to provide the correct SNMP credentials will prevent the agent from gathering device details. This will result in a failed discovery, as the agent cannot confirm the device type or its compatibility.
IPP (Internet Printing Protocol)
The Admin Browser Agent probes for standard IPP and IPP Secure (IPPS) endpoints to confirm the device’s printing capabilities. IPP is a critical component for integrating printers that do not support the Celiveo Embedded Printer Agent. For these devices, MyCeliveo and the Celiveo Universal Printer Endpoint use IPP to securely transmit print jobs from Celiveo Cloud Services to the printing device.
- Configuration: By default, the agent is pre-configured to check the well-known endpoint ipps://ip_address/print on port 443. Some printing devices use non-standard / manually configured ports or URL paths for IPP. To ensure successful discovery, verify the correct IPP/IPPS endpoint by consulting the device’s web administration page and the manufacturer’s official documentation. You must then add any custom endpoints to the agent’s configuration before pressing search.
- Impact: If a device is incompatible with the Celiveo Embedded Printer Agent, it relies on an IPP/IPPS connection for all Celiveo functionality. A failed IPP/IPPS validation for such a device will cause the agent to classify it as unsupported and omit it from the discovery list.
2.1 – Add printers by searching the network
Enter the information and click on the ![]() search icon.
search icon.
- Lower IP Range eg: 10.0.0.1
- Higher IP Range eg: 10.0.0.255
- Timeout settings, default value 250 seconds
2.2 – Add printers with IP/CSV
Enter the information and click on the ![]() search icon.
search icon.
- Press IP/CSV.
- Enter the IP(s) (one per line) or CSV list with IP(s) to import target printers.
- Timeout settings, default value 250 seconds
3 – Search Summary
The search summary section provides a summary of each search done via IP Range or via IP/CSV with information about progress and search status.
4 – Printers
Printers section shows the printers that have been found and allows the administrator to edit information and select the printers that will be imported.
5 – Add Printer from Search Results
After the search results shown in the section 4 illustrated above.
- From the search results, select the printers you want to add.
- Click
![]() at the bottom left.
at the bottom left.
You are returned to the Add Printer wizard. The printers that are reachable are displayed on the top half of the screen, while the printers that are unreachable are displayed on the bottom half of the screen. - Click [Next].
Edit printer settings
Under the printer list, select a printer and click on any icon on the printer taskbar.

| Icon | Menu Option |
|---|---|
| Edit printer settings. | |
| Edit tags and maps. | |
| Edit the language on the Celiveo 365 menu and authentication screens on the printer. | |
| Edit access control and printing rules. | |
| Edit cost definition for the printer. | |
| Sync the selected printer again. |
Edit printer description
You can change the description of any physical printer. As you move the cursor over a printer description that can be changed, the cursor changes to an edit icon ( ![]() ).
).
- Double-click the printer description to change. The Edit Printer screen displays.
- At [Printer Description], specify the new description.
- Click [Save].
Delete a printer
- Under the printer list, select a printer and click on the
![]() [Delete] icon.
[Delete] icon. - When prompted, click [OK].
- When deleting a virtual printer, make sure there are no workstations associated with it. A prompt is displayed to confirm this action.
- Click [OK].
Adding a Universal Printer Endpoint
Printers that do not support embedded agents, Xerox and Fujifilm printers/MFP require one or more Universal Printer Endpoint (UPE) to be installed on a workstation/server on-prem that is able to reach those printers. On these devices some of the communication cannot be done directly to Celiveo 365 and UPE acts as a gateway to expand their capabilities. See here on how to create and deploy UPE.
Post your comment on this topic.